J & S Enterprises |
Woodworking Division
J & S Enterprises |

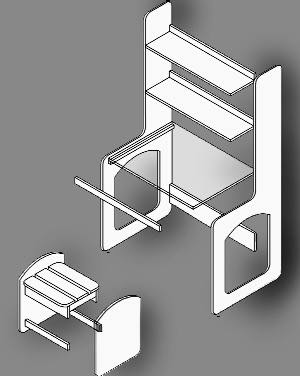
This project makes an excellent study carrell or computer desk using just a single sheet of 3/4" plywood and some one-by strips. The 24" by 32" desktop is ample space for a home computer if you're careful where you place your lower shelf. Cut the desk's sides with a sabre saw. Cut out one side and true the straight edges with a pass on the table saw and sand the rounded corners smooth. Use the first side as a pattern for the second. When you cut the second side, go a little wide of the mark and then trim to the shape of the first side with a bottom-bearing pattern bit in your router. The sides of the bench are cut from the sides of the desk and you must start the cut by drilling a series of small holes in line with the cut to insert the blade. I sometimes vary from the one sheet design on the bench. If I have a little plywood left over from some other project, I mount a shelf to the lower braces for storing a few books or papers,but watch your knee space ! Here's a
cutting diagram for the plywood sheet.
You have several options for assembly, but I usually attach the desk top and lower brace with one-inch strips of pine screwed to the side pieces and then to the top and brace. I use biscuits or cleats to attach the shelves and screw the shelf stiffeners to the sides through pocket holes drilled from behind. With a good grade of plywood, edge-banding isn't really necessary if everything gets a good sanding, but I like to edge-band the front of the desktop just to keep it from splintering. The desk looks nice painted but with a good birch plywood I just give it a few coats of shellac and top off the writing surface and shelves with a waterproof finish.
While I've described briefly how I fabricate these desks, this project lends itself to whatever tools and techniques you have at your disposal. As long as you take care to make all the side-to-side pieces square and of the same length, and are careful about splintering the cross-cuts, the project tends to turn out well.
Oh, one last construction hint: To cut the straight lines with a sabre saw, clamp a pair of straight boards onto the work piece to act as a track for the saw. You'll get perfect cuts every time.